For many creators, recording a voiceover is the most stressful part of editing. You might not have a quiet space, or perhaps you aren’t comfortable using your own voice. This is where Text to Speech in VN Video Editor becomes an essential asset.

The TTS feature uses advanced AI to convert written text into natural-sounding speech. Whether you are making a tutorial, a “storytime” vlog, or a faceless YouTube channel, this tool ensures your audio is crisp, consistent, and professional.
Key Benefits of VN’s Text to Speech:
- Consistency: Unlike human voices that can change based on mood or health, AI voices remain consistent across all your videos.
- Accessibility: Easily add audio descriptions for the visually impaired.
- Privacy: Perfect for creators who prefer to remain anonymous.
- Multilingual Support: Reach a global audience by generating voiceovers in different languages and accents.
How to Use Text to Speech in VN Video Editor
Using the TTS tool is incredibly intuitive. Here is a step-by-step breakdown:
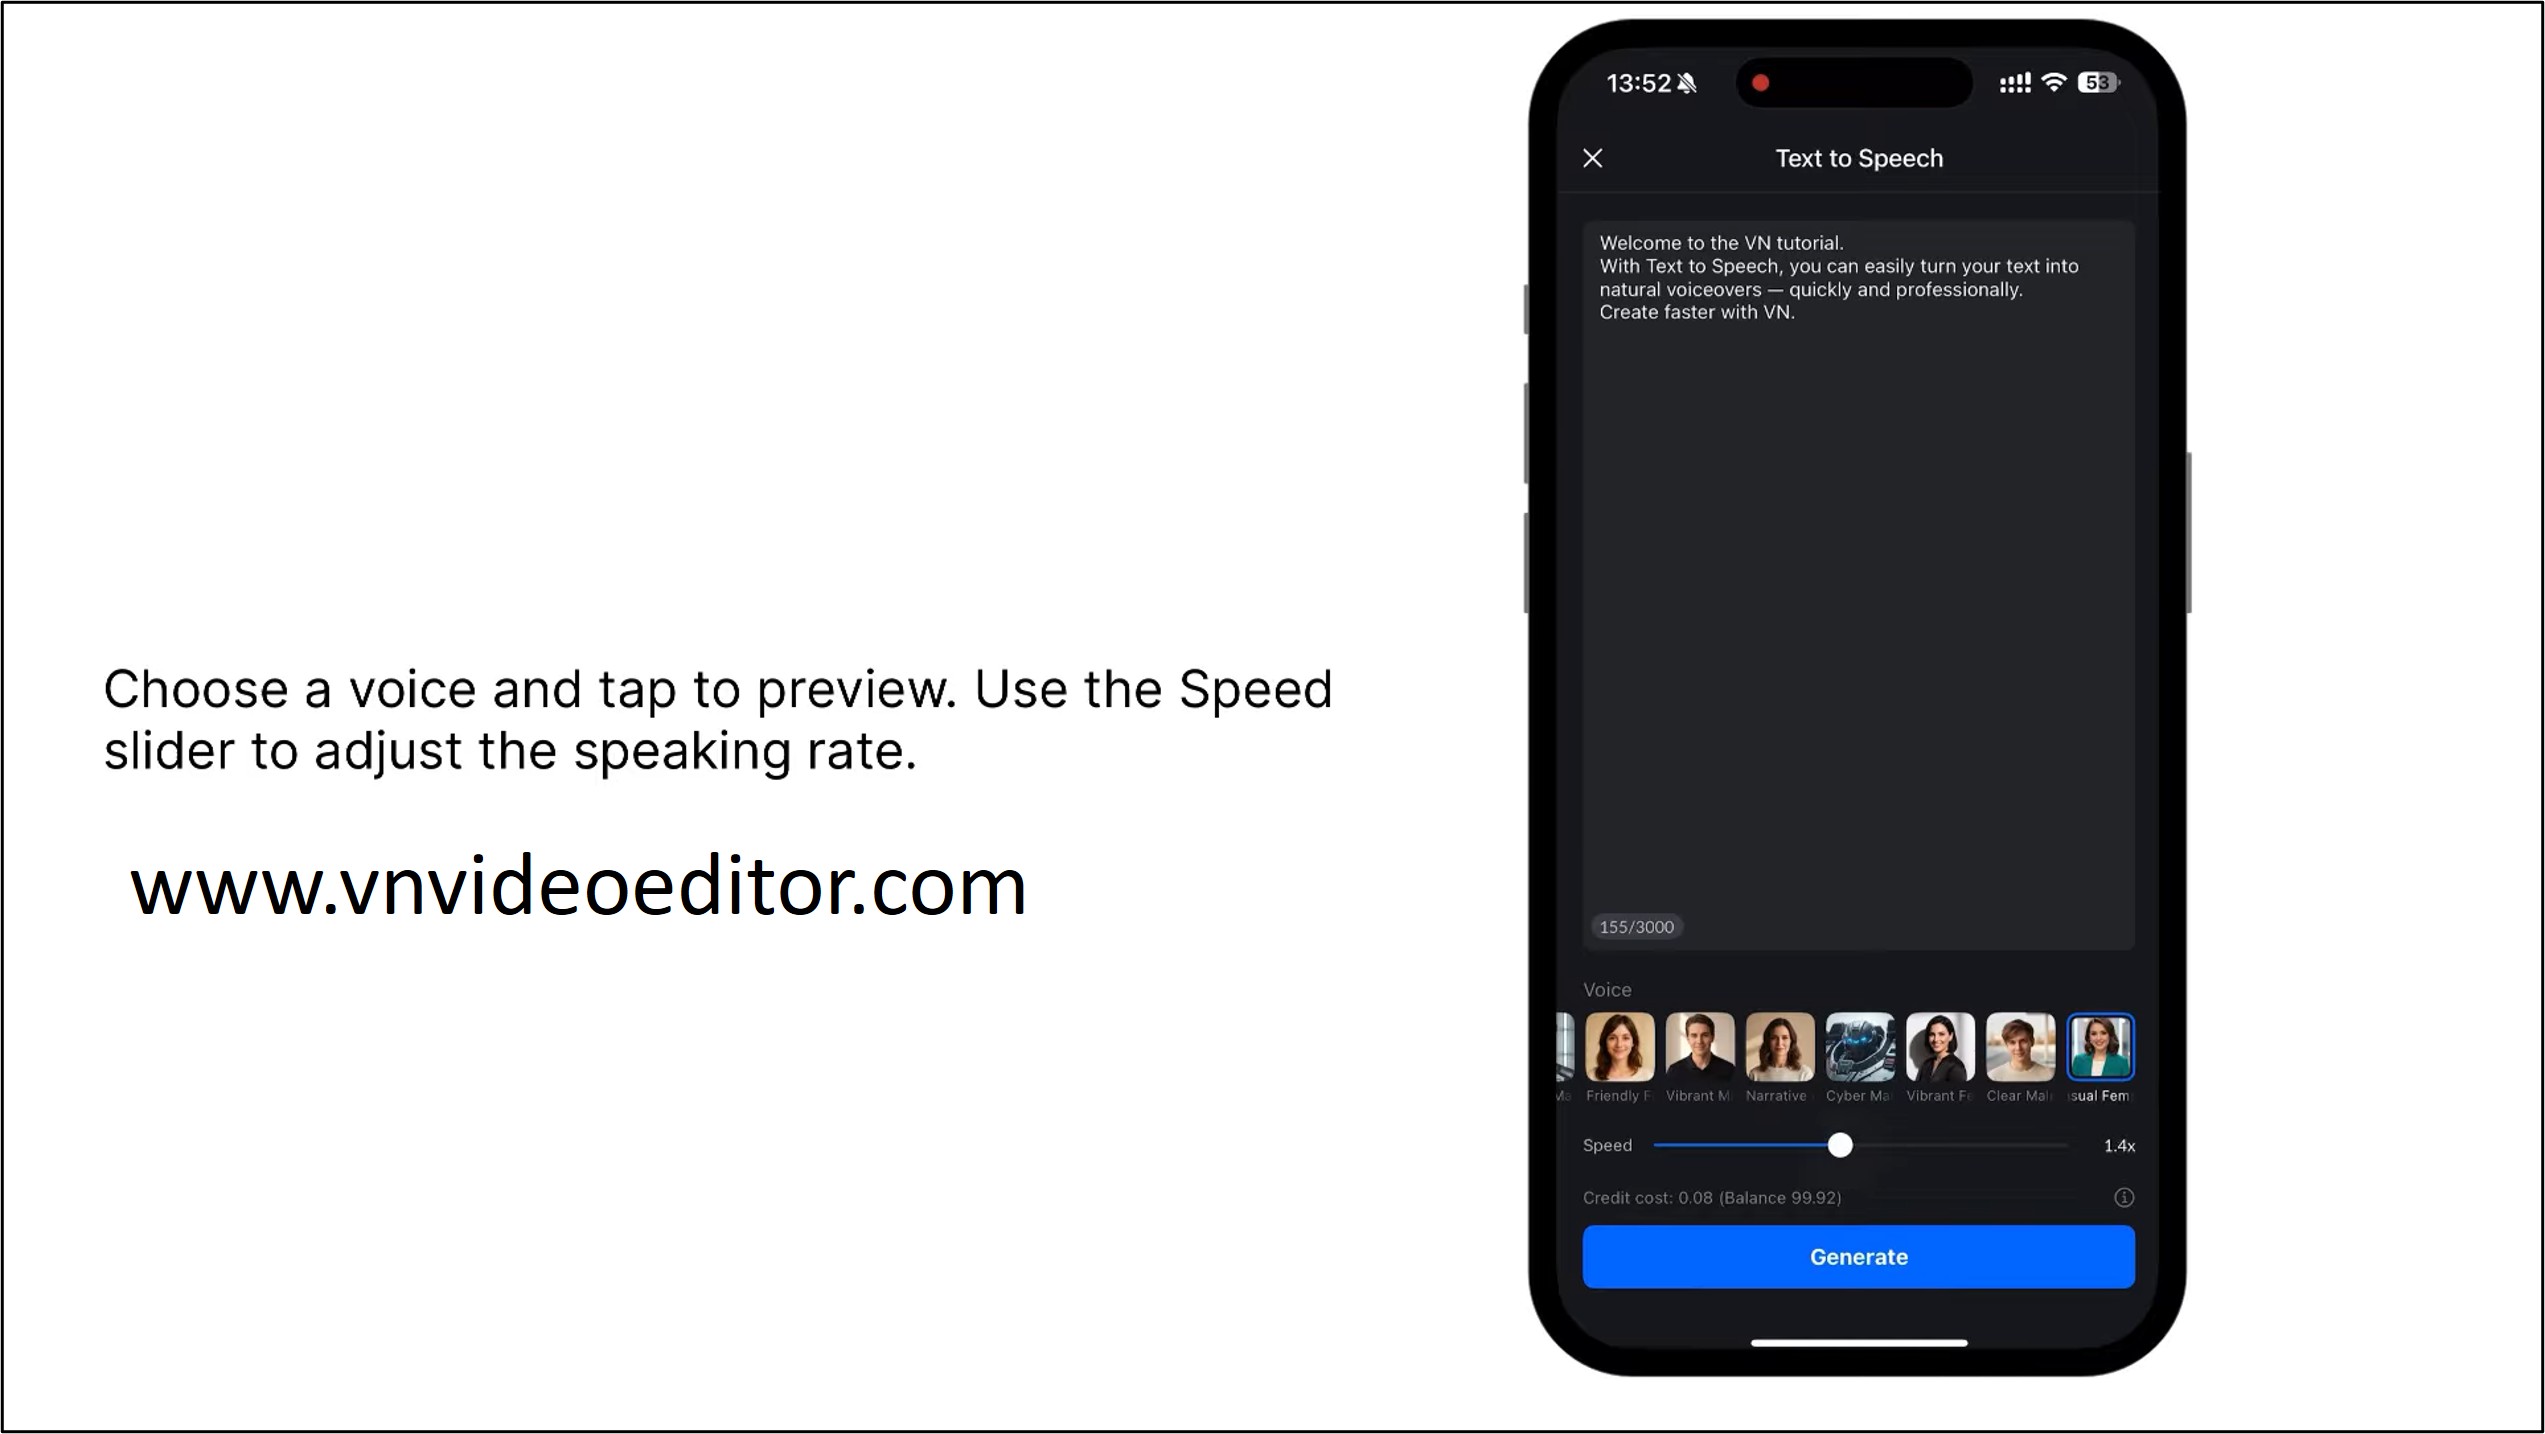
- Add Your Text: Open your project and tap the “T” (Text) icon on the timeline. Choose a template or a standard heading and type your script.
- Select the Text Clip: Once your text is on the timeline, tap on the specific text clip you want to convert.
- Find the TTS Option: In the bottom toolbar, look for the “Text to Speech” button.
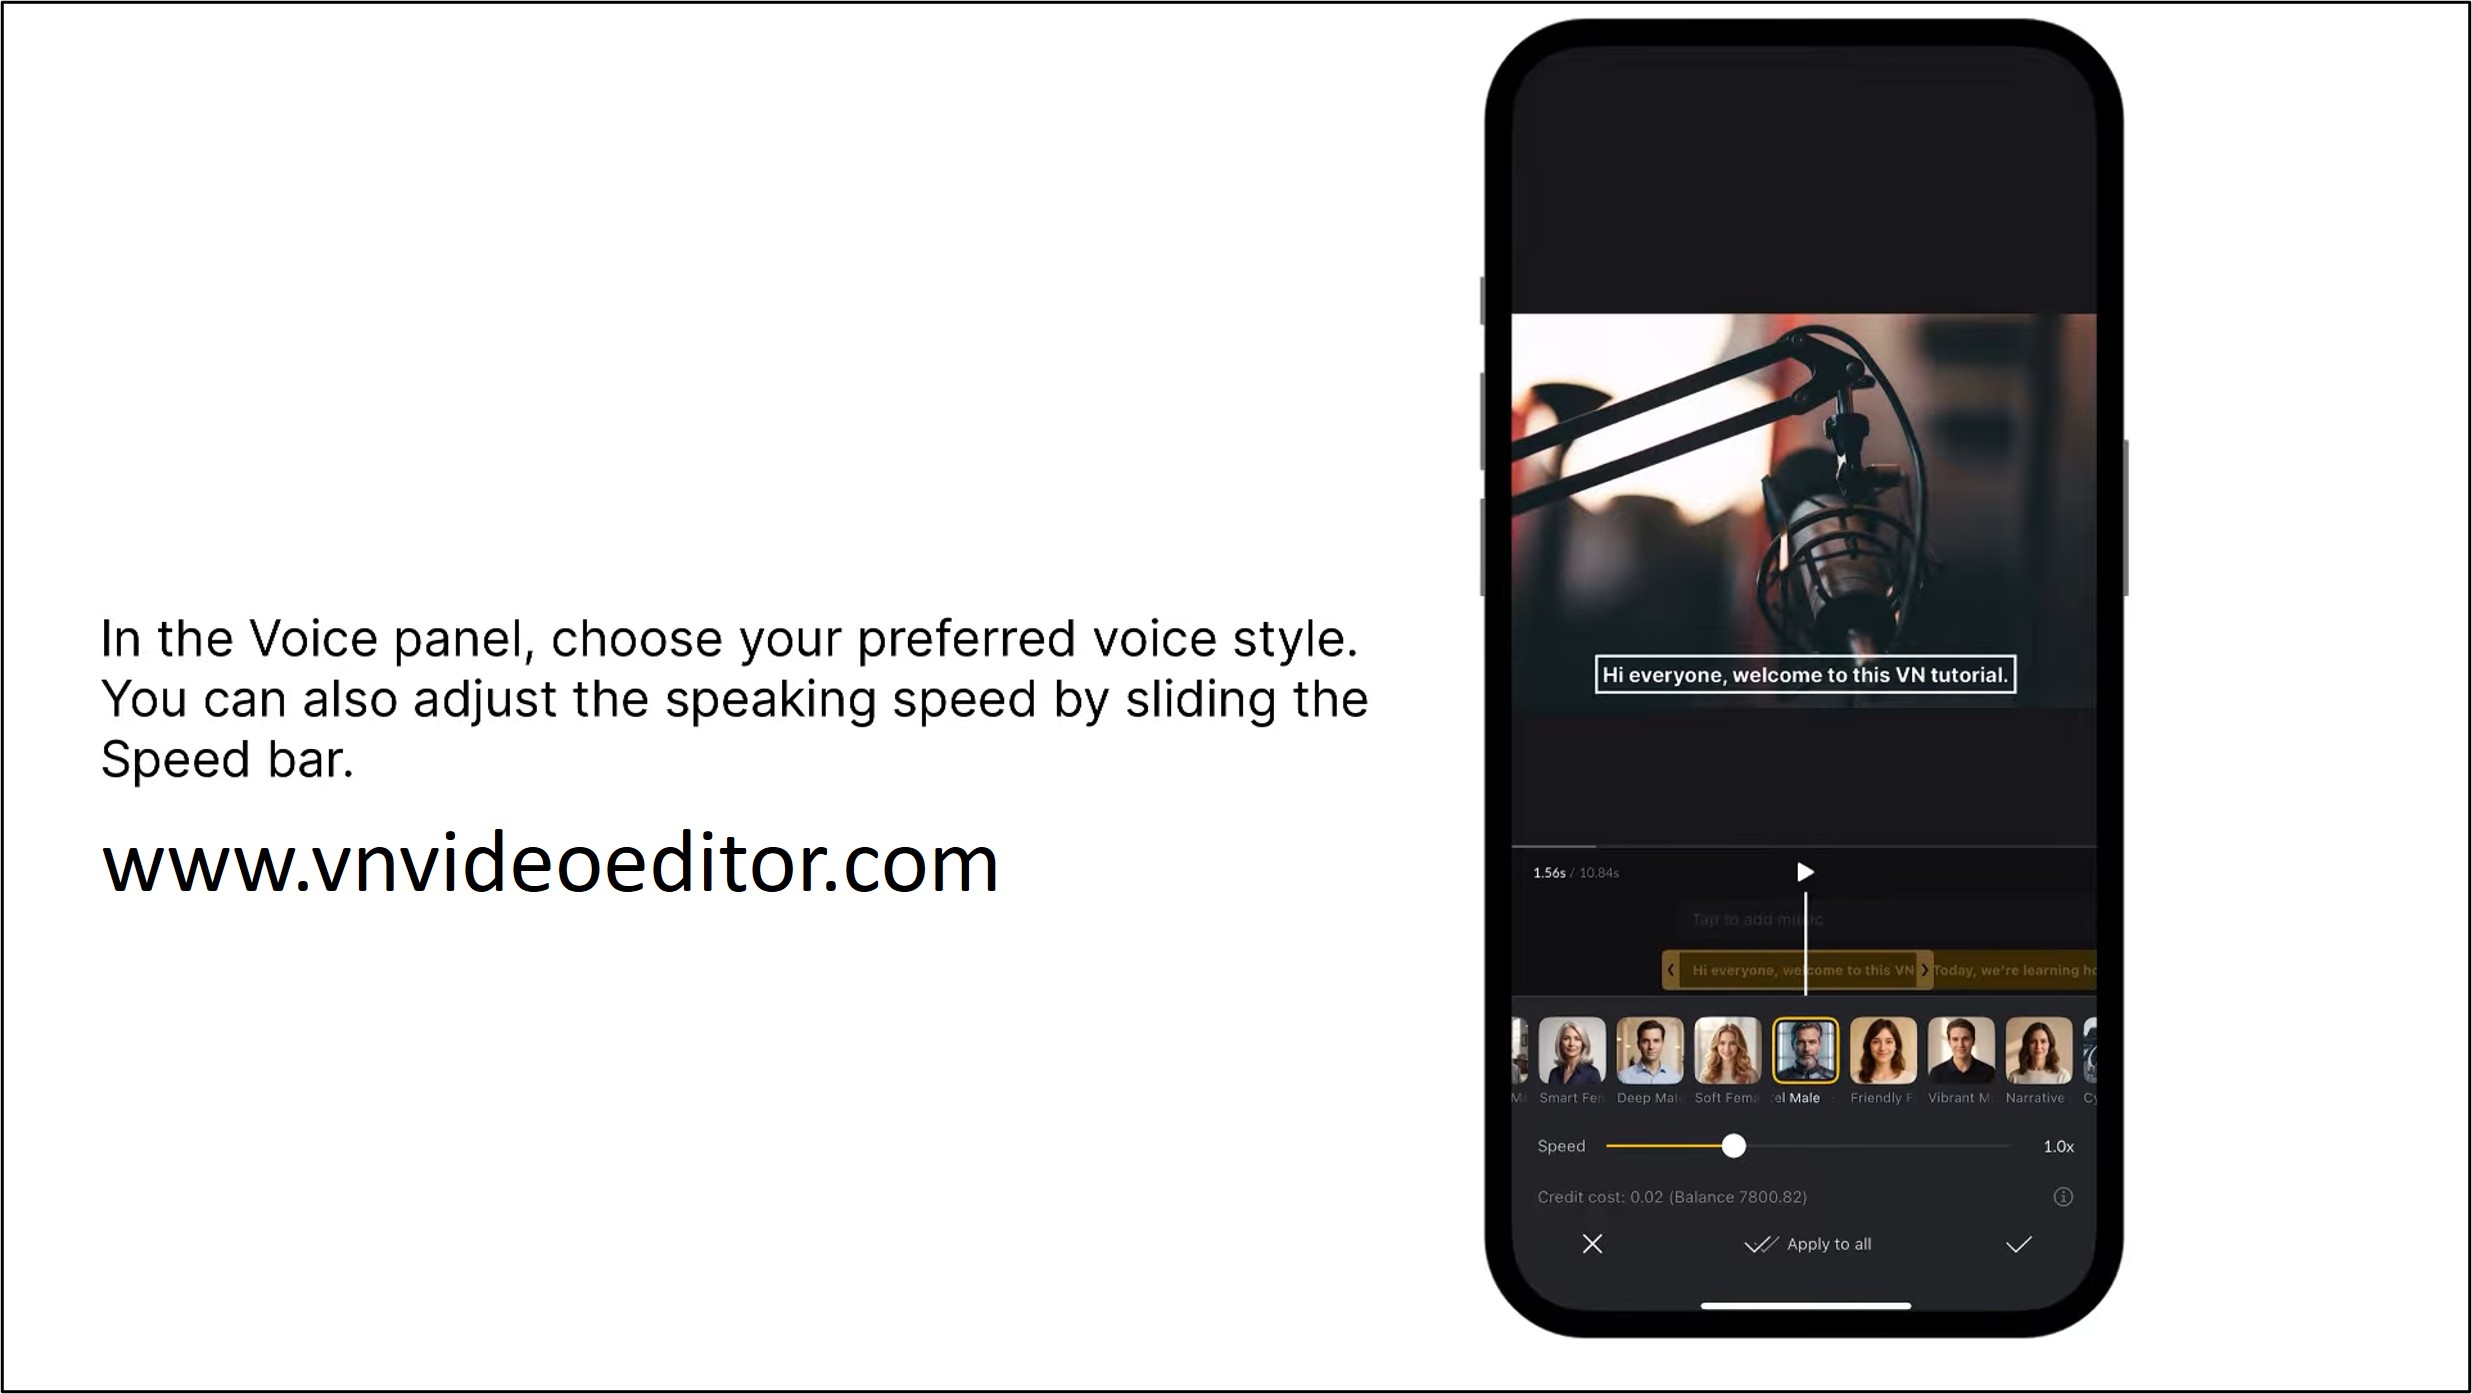
- Choose Your Voice: VN offers a variety of voice profiles—ranging from “Bright” and “Friendly” to more “Serious” or “System-like” tones. You can preview them to see which fits your video’s vibe.
- Adjust and Generate: You can often adjust the Speech Rate (speed) to match the pace of your visuals. Once satisfied, hit the checkmark, and VN will generate an audio file that sits directly under your text on the timeline.
Mastering the Voice Changer Feature
While Text to Speech creates audio from scratch, the Voice Changer is designed to modify existing audio. This is particularly useful if you have recorded a voiceover but want to hide your identity, create a specific character, or simply add a comedic touch.
Why use a Voice Changer?
- Creative Storytelling: Give different “characters” in your vlog distinct voices.
- Privacy Protection: Disguise your natural voice for security or anonymity.
- Engagement: Funny or high-pitched voices (like the “Chipmunk” effect) often perform better on platforms like TikTok and Reels.
How to Apply Voice Effects:
- Select Your Audio: Tap on your recorded voiceover or the original video audio in the timeline.
- Tap “Voice Changer”: Locate this feature in the bottom menu.
- Pick an Effect: VN provides several presets such as Robot, Deep, High, Alien, or Synthesizer.
- Fine-tune: Many of these presets allow you to adjust the pitch or intensity, giving you more control over the “humanized” or “robotic” feel of the output.
Advanced Audio Tips for a Professional Finish
To make your TTS and Voice-Changed audio sound truly “human” and high-end, you shouldn’t just set it and forget it. Use these technical features within VN to polish the sound:
Use Fade In and Fade Out
Abrupt starts and stops in audio can feel jarring to the listener. Always apply a short Fade In (approx. 0.3s) and Fade Out to your TTS clips to make the transitions feel natural.
Background Music (BGM) Balancing
When using AI voices, background music is crucial to fill the “digital silence” between sentences. However, ensure your Volume levels are balanced. A good rule of thumb is to keep your BGM at 10%–20% while the voiceover stays at 80%–90%.
Precision Trimming with the Timeline
VN’s multi-track timeline allows you to zoom in and see the Waveforms. If your Text to Speech has too much silence at the beginning or end, use the Trim or Split tool to cut those gaps. This keeps your video’s pacing tight and engaging.
Common Troubleshooting
- The Voice Sounds Too Robotic: Try breaking your text into smaller sentences. AI often struggles with very long, complex sentences and loses its natural cadence.
- Audio is Out of Sync: Use the Keyframe tool or simply drag the audio clip on the timeline to line up the “peaks” of the waveform with the visual action.
- TTS Not Appearing: Ensure you have updated to the latest version of VN from the App Store or Google Play Store, as these AI features are frequently updated.
Conclusion
The addition of Text to Speech and Voice Changer tools has transformed VN Video Editor from a simple cutting tool into a comprehensive mobile studio. These features allow you to overcome the hurdles of poor recording environments and limited equipment, giving you the power to tell stories with professional audio.
Whether you’re looking to create a viral meme with a quirky voice effect or an educational series with a clean AI narration, these tools provide the flexibility you need.